Wednesday, September 22, 2010

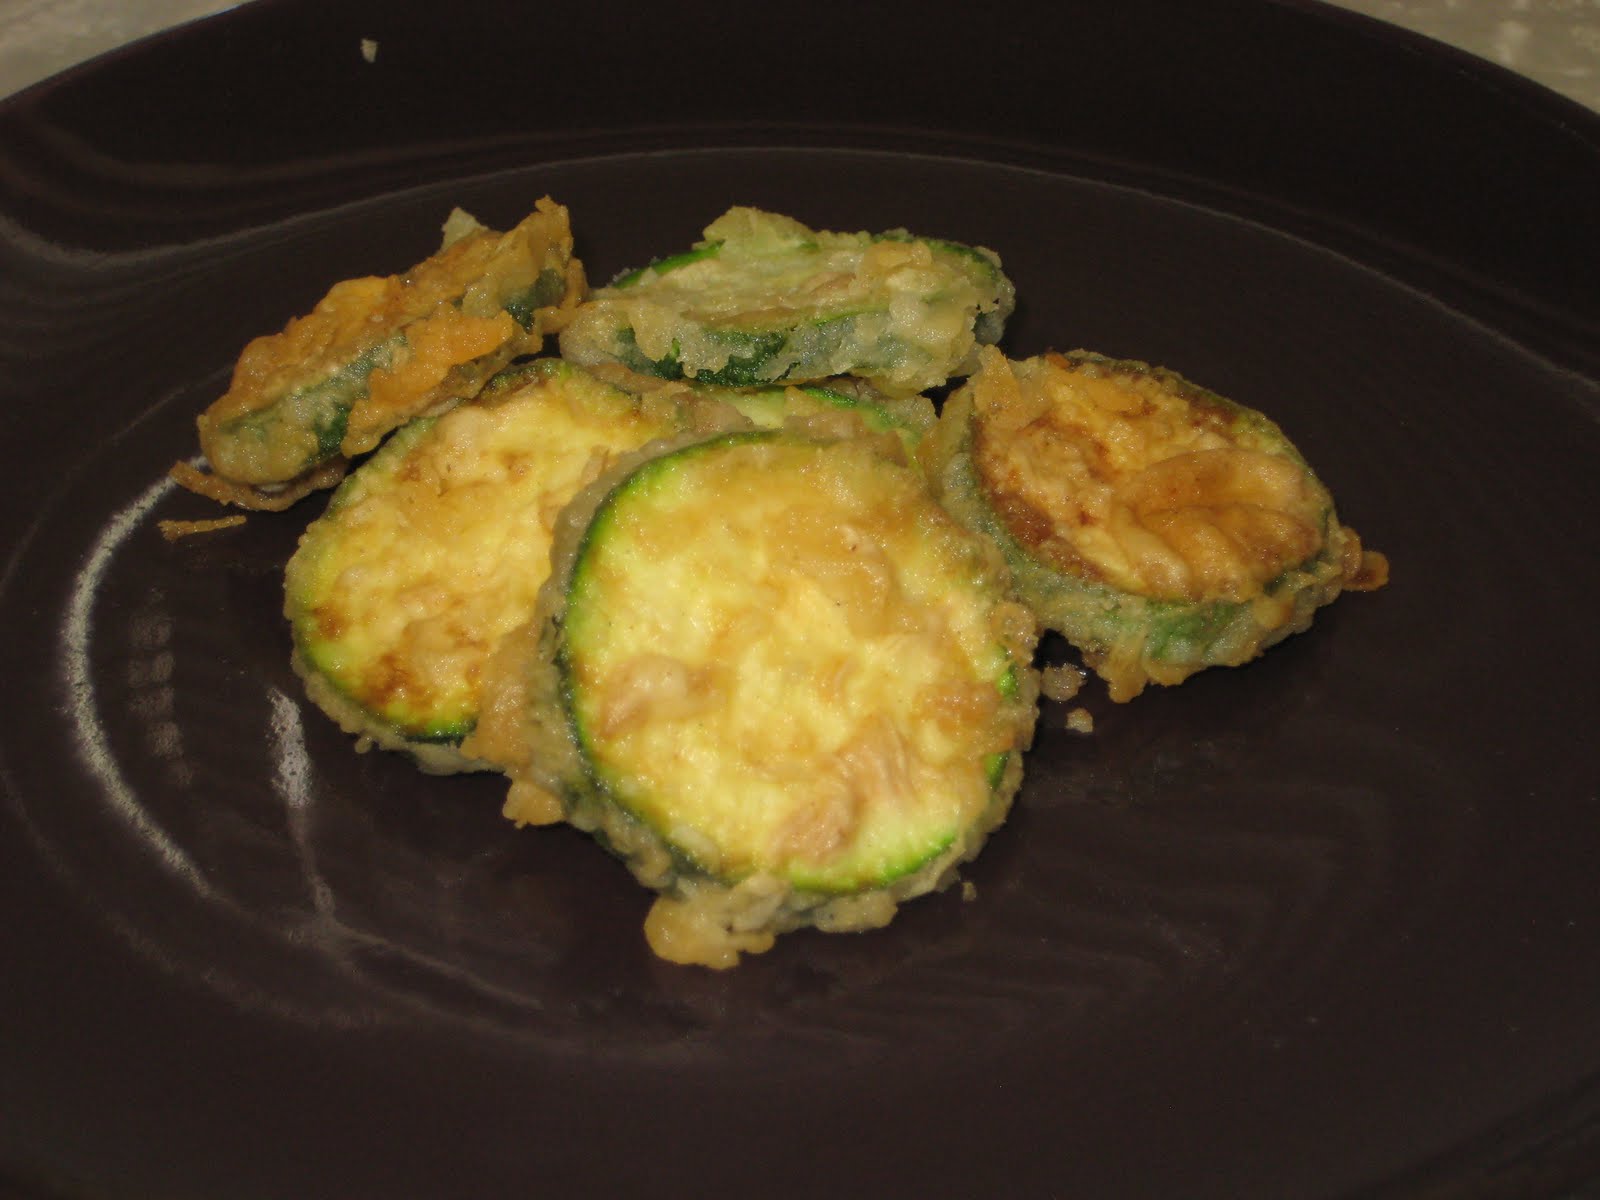
Fried Zucchini


This little number was created in the hustle bustle of our very own at-home Iron Chef competition with some friends. I didn't really measure anything, so this recipe is approximately what I think I put into the batter... Hope you like it!

What you need:
2-3 zucchini or yellow summer squash
2 eggs
2 cups flour
1 tsp white pepper
1/2 tsp salt
vegetable oil for frying

Slice zucchini and/or yellow summer squash into thin rounds. In a small bowl, beat 2 eggs and set aside. In another bowl (I usually use an 8x8 cakepan for this step) mix flour, white pepper, and tsp salt.

Heat some vegetable oil on medium-high heat in a small sauce pan. When oil is hot, take a few zucchini at a time and soak them in the egg, then toss them into the flour mixture until they're covered. shake off any excess and put about 4-5 slices in the oil at a time. (If you add too many too quickly, the oil temp will drop to fast and not fry the zucchini correctly.)

You want the batter to be a nice golden brown. If it is too dark, turn down the heat and wait for the oil to cool before adding more zucchini. Once they're done, take them out and set them on a few sheets of paper towels to absorb some of the oil.

Serve hot and enjoy!

Leave your comments on these if you enjoyed them or if you think I need to add/use less pepper or salt to the recipe. I really have no idea how much I put in the mix haha! I also want to try something similar to this to try and make fried green tomatoes. mmmmm....

Wednesday, September 1, 2010

Homemade Pancakes


We like to have breakfast for dinner at least once a week at our house. And although we try to mix things up by having different styles of eggs, and sometimes french toast, our main B4D meal is pancakes.

But honestly... I'm not such a huge fan of the "just add water" variety even though that's what we always use. We like to add vanilla or other things to the mix to make them taste better, but there's just something off, ya know?

A few months ago I was visiting my sister and they have a family tradition that they eat pancakes (or waffles) for dinner EVERY Sunday. And they know how to mix things up! They had a few different recipes to try and I gotta tell ya, they were fabulous!

I'm sure I'll share some of the other recipes with you someday, but today I'd like to share the recipe that I will now use instead of buying the nasty pre-made stuff: a very simple, homemade, good old fashioned pancake mix.

Ingredients:

2 cups milk
3/4 cup white sugar
2 eggs
1 teaspoon vegetable oil
1 teaspoon vanilla extract
2 cups all-purpose flour
1 1/2 tablespoons baking powder

Mix them all together until the batter is no longer lumpy. Have a pan warming up on the stove to medium heat and spray with non-stick spray. Add 1/4 c of batter and wait til most the bubbles pop and flip over. Let cook a minute or two more and you're done!

Toss on your favorite fruits, cream or syrup and enjoy!! MMMmmmmm....

Monday, August 16, 2010

Homemade Potato Chips


My mouth is watering just thinking about these... mmmmm.... This is a pretty quick recipe to make as far as prep and cooking goes, but it does require some time to chill in the fridge. So make sure you plan ahead.

Start out peeling a few potatoes (not that many, maybe 3 or 4 if there is only a few of you).

Thinly slice your potatoes. If you have a mandolin, it'll be a lot easier to get a consistant size, but we've used a knife just fine.

Soak your chips in a bowl of cold water in the fridge for at the very least 10-15 minutes. But the longer you let them soak, the better they'll taste. I think they taste great if you let them soak around 45 min-1 hr.

Pull out your chips and dry them off on some paper towels. Have some vegetable oil heating up on med-high heat and put in a few chips at a time. If you put too many in at once, the temperature of the oil will drop too quickly and you won't get a crispy chip. Only let them sit until the edges start to get brown and pull them out. (They won't be completely cooked yet) After you've done this to all your chips, give them another dip in the oil just like before. Put them in a bowl with some paper towels to soak up the extra oil and sprinkle some salt on them.

Serve warm and enjoy! They taste a lot like french fries so if you want to dip them in ketchup, go right ahead :)

Tuesday, July 13, 2010

Sweet Land of Liberty!


First of all, I cannot take any credit for the inspiration of this cake. I saw it on another blog I read, who then gave the link for the original idea. And I have to admit, the original one looks MUCH MUCH MUCH better than mine. But I take solice in the fact that it was my first try, and I used store bought icing instead of making my own (which I knew I should have done but didn't have the time to) So- for next time, I know it'll turn out much better than this and won't be so goopy!

And now that we've cleared up all that, onto the cake!

I started out with 2 mixes of white cake.

Make 1 mix exactly as directed for a 2, 9 inch round cake pan recipe. Let cool 10-15 minutes before removing from the pan and let cool completely on a wire rack. Set aside.

Mix the second cake mix as directed and divide batter in half. Using regular food coloring, mix one half with blue coloring and the other half with red. Make sure to use enough to ensure a deep blue and red instead of pastels ;) Bake as directed and cool the same way you did with the white cakes.

Once your cakes are completely cool, take 1 white cake and cut it in half (so that you have 2 thin round cakes about an inch high) Do the same with the red cake.

Place one thin layer of white cake on your serving dish and add a thin layer of icing.


*Note* Here's where I went wrong using storebought icing. It was too runny and basically gave no support to the cake at all. If you have a homemade icing recipe (usually calls for powdered sugar, milk, butter and shortening) use that instead. It should help your cake look "cleaner."

Make sure you only pull the icing in one direction as you ice the cake or you will get little fluffs of cake all over and it will look messy.

Add 1 thin layer of red cake and add another thin layer of icing.


Here's the tricky part... Now you're going to take your remaining thin layers of red and white and cut a small circle out of the center, like a donut. I used a small bowl and pressed it down like a cookie-cutter to make sure I had the same size each time. Place the small white circle in the center of your cake, add a small layer of icing and then the red layer, ice.


Your blue cake should still be the original size. Take the same bowl or whatever you used to measure out the hole for the red and white cakes and cut out a hole in the blue cake. This time, however, you will be using the ring instead of the center. For this next step you will need a second pair of hands (I know because I ripped my cake trying to do this by myself...) Place the blue ring on the top of the cake, with your smaller white and red circles fitting inside.


If the blue sticks up too high (like mine did!) Use a knife and trim it until it is level with the red.

You can now fully ice your cake. When you're ready to serve, your cake should look like this (hopefully better) when you're done.


One great thing about this cake is all the scraps left over- Yum!


I'd like to thank 17 and Baking for this original idea. Click here to see her beautiful cake and don't laugh too hard at mine after you see how amazing hers looks ;)
Thursday, July 1, 2010

Italian-Style Breaded Chicken

I found this recipe online and decided to make this for my husband's birthday dinner. We both LOVED it! I'll definitely be making this one again. The chicken was so moist and crunchy all at the same time and the lemon and rosemary had a flavor party in my mouth. Mmmmm!!


What you need:

1/2 cup mayonnaise
1 clove garlic, minced
1 tsp lemon zest
1 tsp dried rosemary, or 1/2 Tbsp fresh rosemary
juice from 1/4 lemon
1/2 c panko bread crumbs
1/4 c finely crushed almonds
1/4 c grated parmesan cheese
2-4 boneless, skinless chicken breasts

Preheat oven to 375. Grease a casserole dish lightly with olive oil and set aside.

Combine the mayonnaise, lemon zest, rosemary, and lemon juice in a bowl and mix well. Set aside.

In another bowl, combine bread crumbs, almonds and cheese and mix well.

Place chicken in casserole dish and brush mayonnaise mixture on top. Sprinkle the bread crumb mixture on top of the mayonnaise until well coated.

Drizzle olive oil on top of the bread crumbs and bake at 375 for 25-35 minutes or until chicken is done.

Enjoy!

I did change a few things from the original recipe, but I still would like to give them the credit they deserve for inspiring me. Click here for the original.

Wednesday, June 30, 2010

Garlic Shrimp Pasta

I'm SO sorry for my severe lack of posts over the last month. I've been either on vacation, or recuperating from a vacation long enough to catch my breath before heading out the door again and haven't had time to post some yummy stuff.

*Whew!*

So now that I've got a few minutes to share something, I might as well take advantage of it before I'm hit with a round of birthday parties next month- my husband, little girl and myself all share bdays in July, so it's a pretty stressful fun-packed month. (So this is also my upfront apology in case you don't hear from me again for a few weeks ;)

Anyway, back to what you're all here for... the food!

I have been blessed with a wonderful husband who loves to cook. And even better, loves to try new recipes and even make up his own. :) So about 2 weeks ago he found this recipe online (not sure where because I forgot to write down the link) and I LOVED it!


Here's what you need:

2 tsp cornstarch
1 14.5 oz can chicken broth
3 tsp lemon juice
2 tsp olive oil
1 lb. frozen deveined shrimp (thawed)
4 cloves garlic, minced
3 tsp fresh or 1 tsp dried parsley
8 oz extra thin spaghetti, cooked
1/8 tsp ground red pepper
1 tomato, diced

In a small bowl, stir together cornstarch, broth and lemon juice intil smooth. Set Aside.

Heat oil in a 10" skillet over medium-high heat. Cook shrimp, garlic and red pepper, stirring often until shrimp is warm (you don't want it to overcook and be rubbery). Remove from heat and set aside.

In same skillet add cornstarch mixture and cook until mixture boils and thickens, stirring constantly. Return shrimp to skillet, along with cooked spaghetti. Toss in tomatoes and stir. Heat thoroughly. Add parsley and a little red pepper for added flavor.

Serve warm. Makes approx 6 1/2 cups.

Enjoy!

Tuesday, May 25, 2010

Sweet and Sour Pork


We recently stumbled across this recipe in one of our favorite cookbooks and I can't believe we haven't ever made this before! It is simply amazing! A few days after we made this we were eating at a local fast-food chinese place *COUGH!(Panda Express)* Did anybody hear that? I didn't think so... Moving on... After eating their sweet and sour pork I was determined that I didn't think I would ever order it again. I'd rather just make it myself. It's. Just. That. Good.

Here's what you need:

2 lbs lean pork- I bought pork stew meat because it was lean and pre-cut into the perfect size.
2 Tbsp cornstarch
1/4 c soy sauce
3 Tbsp oil
2 c carrots, cut into diagonal chunks
1 med onion, cut into chunks
1 green bell pepper, cut into chunks
1 can (20 oz) chunk pineapple
3 Tbsp cornstarch (yes for a seperate part)
3 Tbsp brown sugar
2 cups pineapple juice
1/4 c white vinegar
1/3 c soy sauce

Cut pork into 2 inch strips/chunks if you didn't buy the stew meat. Mix 2 Tbsp cornstarch and 1/4 c soy sauce. Marinate pork in this mixture for 1-2 hrs or overnight in refrigerator.

Pour contents of bag into hot stir fry pan with oil until evenly brown and tender- about 10 minutes. Remove meat from pan and add carrots and onions to the pan, using more oil if necessary. Cover and cook on low heat until tender-crisp, about 10 minutes. Add bell pepper and pineapple. Return meat to pan and cook for an additional 5 minutes.

While the meat and veggies are cooking, make the sweet and sour sauce. Mix cornstarch (3 Tbsp) and sugar in small saucepan. Add pineapple juice, vinegar and soy sauce. Cook and stir until thickened. Pour over meat and veggies and serve with white rice.

Enjoy!

Click here for more info on the cookbook I got this recipe from.

Monday, May 24, 2010

Bajio Sweet Rice

Oh man... I LOVE this rice. It is so sweet and delicious and goes well with any Mexican dish. Use it on your mexican salads, burritos or as a side dish, but any way you have it, it is just wonderful! And because it isn't spicy, the kids will love it too. I know mine does!


Here's what you need:

1/2-1 tablespoon vegetable oil
1/2 of a white or yellow onion, chopped (add more or less to your taste)
1/2 bunch cilantro (we actually didn't use any because I don't like cilantro, but if you're going for authentic... haha ;)
1 1/3 cups white rice
3 cups chicken broth
1/4-1/2 cup sugar

NOTE: The amount of sugar it calls for makes this rice very sweet. You can change the amount of sugar if you want, but just remember it is supposed to be sweet. Also, if you let the sugar dissolve in the stock before you mix it in with the rice, the sugar won't sit on the bottom of the pan.

Put a little oil in bottom of pan. Saute chopped onion until translucent. Add the chopped cilantro (no big stems) and saute a minute more.
Add the rice, cooking until it is light brown (being careful not to burn).
Combine the chicken broth and sugar, letting sugar dissolve. Then stir into rice until combined. Bring to a boil.
Cover and let cook on low, med-low until rice is done, about 25-30 minutes. Fluff with a fork before serving.

I actually wish I had added a little bit of onion powder to this to help ground the sweetness, so if you want to try that, let me know how it turns out. :)

Wednesday, April 14, 2010

No-Bake Cheesecake


Mmm... yet another cheesecake recipe. I'm telling you, if you don't like cheesecake, this might not be the blog for you because I'm pretty sure at least 75% of my desserts will be some form of cheesecake ;)

And once again sorry for the slightly blurry picture... My camera just isn't so awesome sometimes.

This recipe is fast (except for refrigeration time of course) so it's perfect for if you know you're having company over and want to have a delicious dessert, make it in the morning before work and it'll be ready and waiting for you when you get home.

What you need:
2 8 oz packages cream cheese
1/2 of an 8oz tub of Cool Whip
1/3 cup + 2 Tbsp sugar
1 tsp vanilla

1 graham cracker pie crust

Soften the cream cheese in the microwave for about 10-15 seconds. Blend on med-high speed with an electric mixer into a creamy texture. Add sugar and vanilla and mix well. Fold in cool whip and stir gently with spoon until well blended. Spoon into pie crust and spread evenly. Refrigerate at least 3 hours.

My wonderful hubby told me that he loved this cheesecake, but he said it would be even better with some sort of topping to go with it. So grab a can of your favorite pie filling or toss on some fresh fruit to jazz up this dessert.

If you're in a hurry just use a store bought graham cracker pie crust. They save time and if you're like me and can't make a homemade crust even (hehe) it'll look nicer too. ;)

BUT if you want to make your own crust, here is a quick recipe for that too:

1 sleeve of graham crackers (usually about 6 or 7 crackers)
1/3 cup melted butter
1/4 cup sugar

Crush graham crackers into a fine powder. (This is when I love having a food processer) Mix in sugar and then add butter. Mix well and then press evenly into a 9 inch pie tin. Refrigerate 1 hour before adding pie filling.

Tuesday, April 13, 2010

Stuffed Mushrooms


I remember when I was a kid I didn't like mushrooms. Or at least I didn't think I did... that is until I was working at my first job- a hostess at a seafood restaurant- and I happened to try the stuffed mushrooms. They. Were. Divine.

So about a year ago I tried to make my own version of those mushrooms. I'm not gonna lie, they don't taste exactly as I remember, but seeing as how it's been 7 years since I had them and my memory can only take me so far when composing a dish, I think they turned out pretty tasty.

The last time I made them (besides last night) was Christmas Eve last year. We decided for lunch that day to do all appetizers (cheese and crackers, shrimp and cocktail sauce, artichokes and of course stuffed mushrooms). Our family seemed to enjoy them so I guess I must've done something right, right?

Well here's my recipe for you to enjoy as well.

What you need:

2 packages fresh mushrooms (try and pick ones that look like they have bigger mushrooms)
1 package Jimmy Dean Regular pork sausage
1 tsp basil
1 tsp oregano
1/4 cup grated parmesan cheese
1/4 cup bread crumbs
dash of salt and pepper
Extra Virgin Olive Oil (EVOO)

Clean your mushrooms by taking a damp paper towel and brushing the tops and stems until they look clean. Don't run them under water. To remove the stems just rotate them in a small circular pattern (like a joystick) with just a little bit of pressure and it should pop right out and leave the top looking like a little bowl. Set the tops aside. Chop up the stems into tiny pieces and set aside.

Brown the sausage until it's cooked all the way through, drain excess grease and put in a large mixing bowl. While the pan is still hot, put about 1 Tbsp EVOO in the pan and cook the stems for about 2-3 minutes. Toss sausage back into the pan with the stems and add the basil and oregano. Salt and pepper to taste and let cooke for another 2-3 minutes, then pour mixture back into mixing bowl. Add cheese and bread crumbs, mix until well blended.

Pour about 1/4 cup EVOO into small bowl and use a basting brush to brush oil onto the mushroom tops. Cover the smooth side and set in a 13x9 casserole dish. Once all mushroom tops have been brushed with oil, use a spoon and fill tops with sausage filling. Don't worry if not much will fit inside the mushroom. Most of the sausage mixture will be a little mound on the top anyway. Top with any shredded Itailian cheese you'd like and drizzle any remaining olive oil on top of mushrooms.

Bake for 15 minutes at 350 degrees.

Enjoy!