Showing posts with label side dish. Show all posts

Wednesday, September 22, 2010

Fried Zucchini


This little number was created in the hustle bustle of our very own at-home Iron Chef competition with some friends. I didn't really measure anything, so this recipe is approximately what I think I put into the batter... Hope you like it!

What you need:
2-3 zucchini or yellow summer squash
2 eggs
2 cups flour
1 tsp white pepper
1/2 tsp salt
vegetable oil for frying

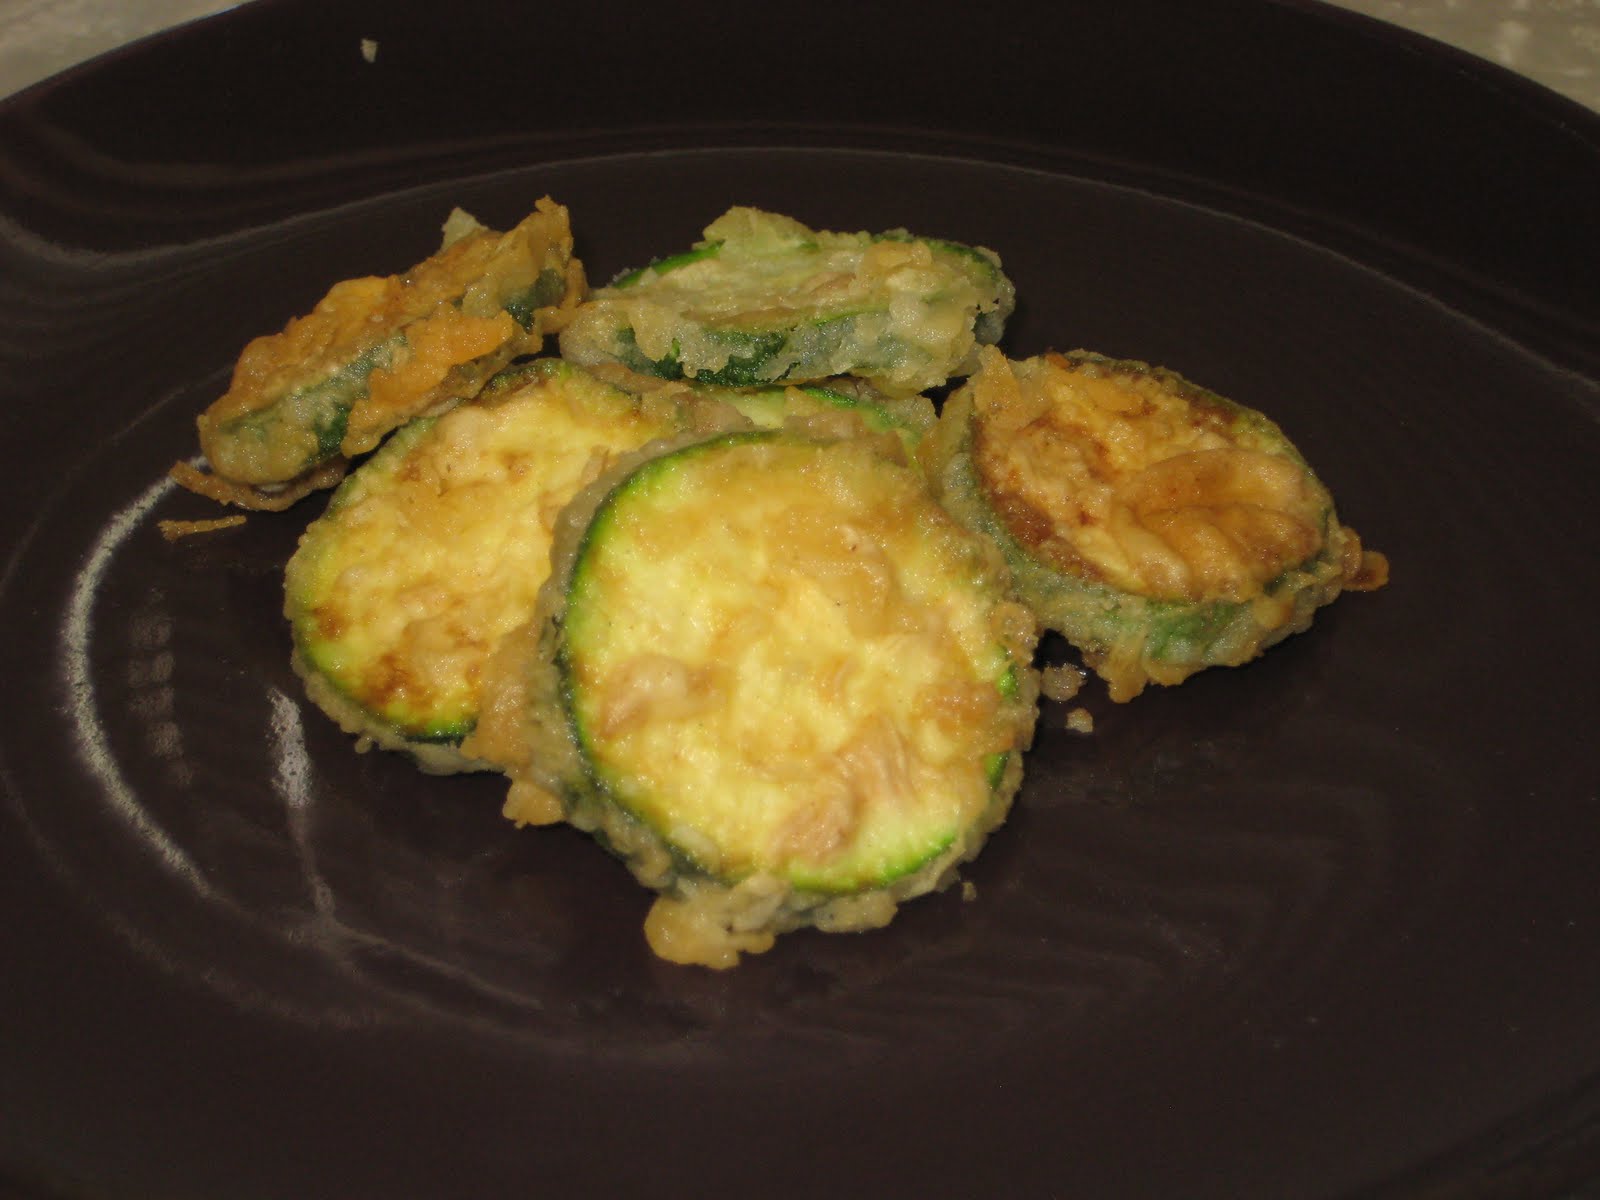
Slice zucchini and/or yellow summer squash into thin rounds. In a small bowl, beat 2 eggs and set aside. In another bowl (I usually use an 8x8 cakepan for this step) mix flour, white pepper, and tsp salt.

Heat some vegetable oil on medium-high heat in a small sauce pan. When oil is hot, take a few zucchini at a time and soak them in the egg, then toss them into the flour mixture until they're covered. shake off any excess and put about 4-5 slices in the oil at a time. (If you add too many too quickly, the oil temp will drop to fast and not fry the zucchini correctly.)

You want the batter to be a nice golden brown. If it is too dark, turn down the heat and wait for the oil to cool before adding more zucchini. Once they're done, take them out and set them on a few sheets of paper towels to absorb some of the oil.

Serve hot and enjoy!

Leave your comments on these if you enjoyed them or if you think I need to add/use less pepper or salt to the recipe. I really have no idea how much I put in the mix haha! I also want to try something similar to this to try and make fried green tomatoes. mmmmm....

Monday, August 16, 2010

Homemade Potato Chips


My mouth is watering just thinking about these... mmmmm.... This is a pretty quick recipe to make as far as prep and cooking goes, but it does require some time to chill in the fridge. So make sure you plan ahead.

Start out peeling a few potatoes (not that many, maybe 3 or 4 if there is only a few of you).

Thinly slice your potatoes. If you have a mandolin, it'll be a lot easier to get a consistant size, but we've used a knife just fine.

Soak your chips in a bowl of cold water in the fridge for at the very least 10-15 minutes. But the longer you let them soak, the better they'll taste. I think they taste great if you let them soak around 45 min-1 hr.

Pull out your chips and dry them off on some paper towels. Have some vegetable oil heating up on med-high heat and put in a few chips at a time. If you put too many in at once, the temperature of the oil will drop too quickly and you won't get a crispy chip. Only let them sit until the edges start to get brown and pull them out. (They won't be completely cooked yet) After you've done this to all your chips, give them another dip in the oil just like before. Put them in a bowl with some paper towels to soak up the extra oil and sprinkle some salt on them.

Serve warm and enjoy! They taste a lot like french fries so if you want to dip them in ketchup, go right ahead :)

Monday, May 24, 2010

Bajio Sweet Rice

Oh man... I LOVE this rice. It is so sweet and delicious and goes well with any Mexican dish. Use it on your mexican salads, burritos or as a side dish, but any way you have it, it is just wonderful! And because it isn't spicy, the kids will love it too. I know mine does!


Here's what you need:

1/2-1 tablespoon vegetable oil
1/2 of a white or yellow onion, chopped (add more or less to your taste)
1/2 bunch cilantro (we actually didn't use any because I don't like cilantro, but if you're going for authentic... haha ;)
1 1/3 cups white rice
3 cups chicken broth
1/4-1/2 cup sugar

NOTE: The amount of sugar it calls for makes this rice very sweet. You can change the amount of sugar if you want, but just remember it is supposed to be sweet. Also, if you let the sugar dissolve in the stock before you mix it in with the rice, the sugar won't sit on the bottom of the pan.

Put a little oil in bottom of pan. Saute chopped onion until translucent. Add the chopped cilantro (no big stems) and saute a minute more.
Add the rice, cooking until it is light brown (being careful not to burn).
Combine the chicken broth and sugar, letting sugar dissolve. Then stir into rice until combined. Bring to a boil.
Cover and let cook on low, med-low until rice is done, about 25-30 minutes. Fluff with a fork before serving.

I actually wish I had added a little bit of onion powder to this to help ground the sweetness, so if you want to try that, let me know how it turns out. :)

Tuesday, April 13, 2010

Stuffed Mushrooms


I remember when I was a kid I didn't like mushrooms. Or at least I didn't think I did... that is until I was working at my first job- a hostess at a seafood restaurant- and I happened to try the stuffed mushrooms. They. Were. Divine.

So about a year ago I tried to make my own version of those mushrooms. I'm not gonna lie, they don't taste exactly as I remember, but seeing as how it's been 7 years since I had them and my memory can only take me so far when composing a dish, I think they turned out pretty tasty.

The last time I made them (besides last night) was Christmas Eve last year. We decided for lunch that day to do all appetizers (cheese and crackers, shrimp and cocktail sauce, artichokes and of course stuffed mushrooms). Our family seemed to enjoy them so I guess I must've done something right, right?

Well here's my recipe for you to enjoy as well.

What you need:

2 packages fresh mushrooms (try and pick ones that look like they have bigger mushrooms)
1 package Jimmy Dean Regular pork sausage
1 tsp basil
1 tsp oregano
1/4 cup grated parmesan cheese
1/4 cup bread crumbs
dash of salt and pepper
Extra Virgin Olive Oil (EVOO)

Clean your mushrooms by taking a damp paper towel and brushing the tops and stems until they look clean. Don't run them under water. To remove the stems just rotate them in a small circular pattern (like a joystick) with just a little bit of pressure and it should pop right out and leave the top looking like a little bowl. Set the tops aside. Chop up the stems into tiny pieces and set aside.

Brown the sausage until it's cooked all the way through, drain excess grease and put in a large mixing bowl. While the pan is still hot, put about 1 Tbsp EVOO in the pan and cook the stems for about 2-3 minutes. Toss sausage back into the pan with the stems and add the basil and oregano. Salt and pepper to taste and let cooke for another 2-3 minutes, then pour mixture back into mixing bowl. Add cheese and bread crumbs, mix until well blended.

Pour about 1/4 cup EVOO into small bowl and use a basting brush to brush oil onto the mushroom tops. Cover the smooth side and set in a 13x9 casserole dish. Once all mushroom tops have been brushed with oil, use a spoon and fill tops with sausage filling. Don't worry if not much will fit inside the mushroom. Most of the sausage mixture will be a little mound on the top anyway. Top with any shredded Itailian cheese you'd like and drizzle any remaining olive oil on top of mushrooms.

Bake for 15 minutes at 350 degrees.

Enjoy!

Wednesday, March 31, 2010

Chili's Awesome Blossom (sort of...)


While the hubby and I were discussing our menu for the week, we were trying to think of a good side dish to go with the hamburgers we planned on having tonight. Normally we have baked beans (which reminds me I really need to post that recipe cause my hubby makes a mean dish of baked beans...mmmm *licking lips*) but instead we decided to go with a recipe we had tried a while back and hadn't made in a really long time- Chili's Awesome Blossom. Now granted we don't actually make the blossom so much as we just make onion rings with the batter and dipping sauce, but they are delicious just the same.

Here's what you need:

2 yellow onions
2 1/2 cups flour
2 tsp McCormick Seasoned Salt (Season-All)
1/2 tsp black pepper
1/4 tsp garlic powder
1 cup buttermilk (If you don't have buttermilk on hand- cause I know we normally don't, just mix 1 cup regular milk with 1 Tbsp lemon juice and let sit for 5 min)
Canola oil for frying

Slice onions into rings and let them soak in cold water for at least 5 minutes. I let them soak while I made the batter. Combine dry ingredients in one large bowl and have buttermilk in a seperate bowl.

Dip onion rings a few at a time into flour mixture, then buttermilk, and then back into flour mixture. Place ring in hot canola oil and fry til golden brown. Don't try and fry too many rings at once or your oil will drop drastically in temperature and you won't get a good crispy onion ring.

To make the dipping sauce, mix all these ingredients and serve in a small dipping bowl:

1/2 cup sour cream
2 Tbsp ketchup
1/2 tsp McCormick Seasoned Salt
1/8 tsp crushed red pepper
1/4 tsp paprika

If you really want to try making the blossom, here's how. We haven't ever tried it, but be sure to let me know how it turns out:

Onion may be sliced like a blossom by cutting the top 1/4 off, the top has the stem. Then peel and be very careful to leave the root intact. Carefully slice from the top of the onion down but stop about 1/2" before you get to the root, taking care not to cut through the root. Slice the rest of the onion like a pie into many servings.

When complete soak onion in cold ice water for 1/2 hour so the onion's petals will start to open up and bloom. Drain onion and dip in flour mixture and dust well. Dip onion then in buttermilk and back in flour mixture. Place in hot oil and fry until golden. Oil should cover onion.

When done drain well and place on plate and cut center out of onion so the petals may easily be removed.


Hope you enjoy your delicious onions!

Friday, March 12, 2010

Sweet and Sour Green Beans


The first Thanksgiving I had with my husband's side of the family they had the traditional green bean casserole. You know, the one with the cream of mushroom soup and crispy onions on top? Well I've gotta admit, I don't remember my family ever making those green beans growing up, so I wondered, "How traditional is this casserole?" At our house it was always my grandma's sweet and sour green beans. I've made it a few times for my husband's family (one of those times being last Thanksgiving which we celebrated at our house) and they all seemed to enjoy it.

So thanks Meme for always making such delicious green beans and for passing along the recipe.

Why are they so delicious you may ask? Well what if I told you there was 8 strips of bacon and a lot of sugar? hehehehe.... Cause we all know that bacon makes everything taste that much better!!

Here's what you need:

3 cans of french style green beans
1 medium onion cut into thin rings
8 bacon strips (or the whole package if you really feel like it. I know I usually do ;)
1/2 cup slivered almonds
6 Tbsp sugar
6 Tbsp apple cider vinegar

*YOU MUST DO THIS THE NIGHT BEFORE YOU PLAN ON SERVING THIS DISH*

Drain beans and place in a 13x9 casserole dish. Place onion rings over beans. Cook bacon and set aside. (Leaving the grease in the pan) Crumble the bacon and sprinkle it and the almonds over the beans. Cook sugar and vinegar in bacon grease until dissolved. Pour over beans.

Cover and refrigerate overnight. Bake at 350 for 40 minutes and enjoy!!